
Understanding Vinyl Plank Flooring
What is Vinyl Plank Flooring?
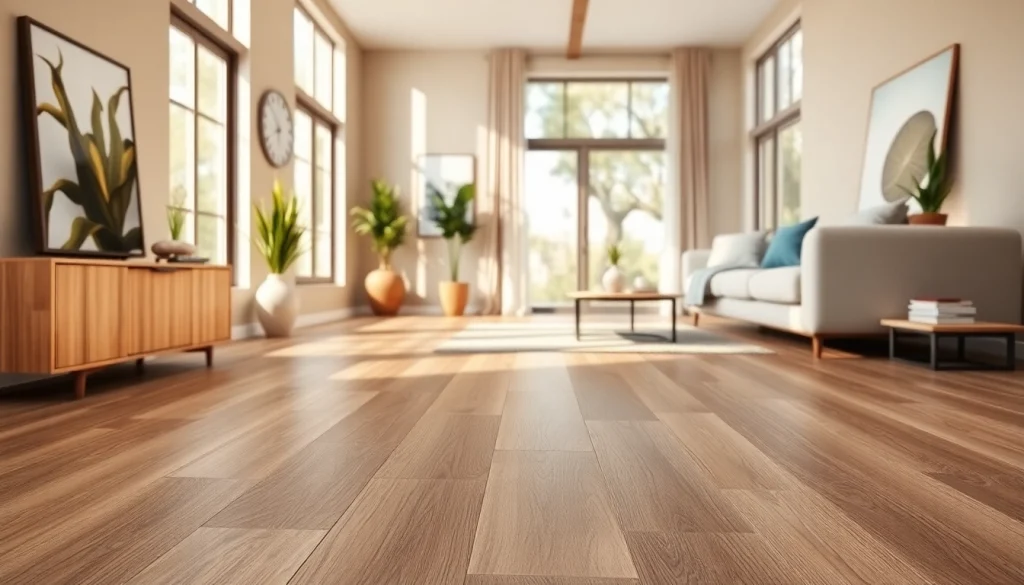
Vinyl plank flooring is a versatile and durable flooring option designed to mimic the appearance of natural materials, such as hardwood or stone, without the high maintenance or costs associated with those materials. Made from synthetic materials, it combines aesthetics with functionality, making it a popular choice for various residential and commercial spaces. The core of vinyl plank flooring consists of multiple layers that offer stability, water resistance, and sound absorption, making it suitable for high-traffic areas and moisture-prone locations. Whether you’re exploring vinyl plank flooring for its convenience or design, it’s critical to grasp its essential features and benefits.
Benefits of Choosing Vinyl Plank Flooring
Vinyl plank flooring presents a multitude of benefits for home and business owners alike. Some of the most compelling advantages include:
- Water Resistance: Vinyl plank flooring is inherently water-resistant, making it ideal for laundry rooms, kitchens, and bathrooms where moisture is prevalent.
- Durability: With its wear layer, vinyl plank flooring can withstand scratches, dents, and stains, ensuring longevity even in high-traffic areas.
- Comfort: Vinyl planks often have a cushioned feel underfoot, offering comfort during long hours of standing or walking.
- Easy Installation: Many vinyl planks feature click lock designs that simplify installation, making it possible for homeowners to do it themselves
- Variety of Designs: Available in numerous colors, patterns, and styles, it can complement any aesthetic from modern to rustic.
- Cost-Effective: Compared to other flooring options, vinyl plank flooring is an affordable choice without sacrificing quality or appearance.
Types of Vinyl Plank Flooring Available
Understanding the different types of vinyl plank flooring can help you make a more informed choice. Here are the primary types:
- Luxury Vinyl Plank (LVP): Known for its high-quality appearance and realistic textures, LVP is thicker and offers better durability and sound insulation.
- Standard Vinyl Plank: This option is usually thinner and more affordable, suitable for low-budget projects while still offering attractive designs.
- Rigid Core Vinyl Plank: This type contains a dense core that provides superior durability and is often used in commercial spaces or areas with heavy foot traffic.
- Glue-Down Vinyl Plank: Ideal for both residential and commercial uses, this option offers a permanent bond but requires professional installation for the best results.
Installation Process of Vinyl Plank Flooring
Preparing Your Space for Installation
Proper preparation is crucial to ensure a successful vinyl plank flooring installation. Start by removing any existing flooring materials and thoroughly cleaning the subfloor to remove debris and contaminants. Ensure the subfloor is level and dry, as even minor imperfections can lead to complications during and after installation. If you spot any cracks or holes, repair them before laying down your new flooring. Finally, acclimate your vinyl planks by letting them sit in the installation area for at least 48 hours. This helps the material adjust to the room’s temperature and humidity levels, preventing expansion or contraction after installation.
Step-by-Step Installation Guide
Follow this detailed step-by-step guide for a smooth vinyl plank flooring installation:
- Gather Your Materials: Ensure you have all necessary tools, including a utility knife, taping measure, underlayment, and spacers.
- Mark the Center: Using a chalk line, mark the center of the room where you’ll start laying the planks for a balanced look.
- Install Underlayment: If required, place the underlayment according to the manufacturer’s instructions to provide cushioning and sound reduction.
- Lay the First Row: Align the first row of planks, using spacers against the wall to maintain a consistent expansion gap.
- Continue Laying Rows: Click or glue each plank into place, ensuring tight seams to avoid gaps.
- Cut Planks as Necessary: Use your utility knife to trim planks at the end of each row, utilizing any leftover pieces to minimize waste.
- Install Transition Strips: Once all planks are laid, install transition strips at doorways, thresholds, and areas where different flooring types meet.
- Final Inspection: Walk through the entire installation to ensure all planks are secure and look uniform.
Common Mistakes to Avoid
When installing vinyl plank flooring, avoiding common pitfalls can save you time and money. Here are the key mistakes to watch out for:
- Neglecting Subfloor Preparation: Failing to properly clean and level the subfloor can cause issues in the long term.
- Ignoring Acclimation: Skipping the acclimation step can result in planks that buckle or gap over time.
- Incorrect Installation Pattern: Random patterns may lead to a disjointed visual look; adhere to a systematic layout.
- Forgetting Expansion Gaps: Not leaving the necessary space around the perimeter can restrict the natural expansion and contraction of the planks.
- Rushing the Job: A hurried installation is often riddled with mistakes and fixable errors can become costly in the long run.
Maintenance Tips for Vinyl Plank Flooring
Daily Care Practices
Maintaining vinyl plank flooring is relatively easy, and daily practices can help keep it looking new. To care for your flooring:
- Sweep or Vacuum Regularly: Remove dust and debris to prevent scratching the surface.
- Mop with a Damp Cloth: Use a damp (not soaking wet) cloth or mop with a gentle cleaner specifically formulated for vinyl flooring.
- Avoid Harsh Chemicals: Steer clear of abrasive cleaners or tools that can damage the finish.
- Use Doormats: Place doormats at entrances to minimize dirt tracked onto the floor.
Long-Term Maintenance Considerations
For long-term maintenance, consider these practices to extend the life of your vinyl plank flooring:
- Periodical Deep Cleaning: Every few months, perform a deeper clean that includes a thorough mopping and a specialized vinyl cleaner.
- Routine Inspection: Regularly check for scratches or wear and address minor issues before they become significant problems.
- Consider Use of Rugs: Area rugs can reduce wear in high-traffic zones while adding an aesthetic touch.
How to Repair Common Issues
Addressing repairs on vinyl plank flooring can often be done without professional help. Here are some common issues and how to handle them:
- Scratches: Minor scratches can often be buffed out using a floor cleaner and a soft cloth, while deeper scratches may require a floor repair kit.
- Gaps: If you notice gaps between planks, they may need reinstallation or the use of a tongue-and-groove adhesive to secure them.
- Bubbles: If bubbles form, they can sometimes be removed by heating the area with a hairdryer and pressing the bubble out with a cloth.
Design Ideas Utilizing Vinyl Plank Flooring
Creating Cozy Living Spaces
Vinyl plank flooring offers endless design possibilities, especially when creating warm, inviting living spaces. Consider using lighter-colored planks to open up small areas or rich, dark tones to add depth to larger spaces. Use area rugs to define sections within an open floor plan, providing both visual appeal and comfort underfoot.
Vinyl Plank Flooring in Kitchens and Bathrooms
In kitchens and bathrooms, vinyl plank flooring shines due to its water-resistant nature and ease of maintenance. Opt for planks in classic styles such as herringbone or diagonal patterns to create an eye-catching element. Consider pairing vinyl with contrasting cabinets or countertops for a cohesive design that elevates the overall aesthetic.
Innovative Trends in Flooring Designs
Stay ahead of the trends with innovative vinyl plank designs, such as textured finishes that mimic real hardwood or stone surfaces. Choose planks in unexpected colors, like deep greens or grays, or combine different styles for unique visual interest, such as alternating widths or designs that create patterns across the floor.
Cost Considerations and Budgeting
Understanding the Cost of Vinyl Plank Flooring
The cost of vinyl plank flooring can greatly vary based on quality, brand, and design. On average, you can expect to pay between $2 to $7 per square foot for materials. Additional costs for underlayment, installation (if not DIY), and finishing touches such as trim or transition strips should also be considered in your budget.
Comparing Costs with Other Flooring Options
When comparing vinyl plank flooring to other flooring types, such as hardwood or tile, vinyl typically comes at a lower price point without significant sacrifice in aesthetics or durability. Unlike hardwood, which requires special treatments and can be much more expensive, or tile, which can require extensive labor for installation, vinyl offers a budget-friendly alternative that remains stylish.
Tips for Budgeting Your Flooring Project
For a successful flooring project budget, start with a clear outline of the total space you plan to cover to calculate material costs accurately. Factor in both immediate and long-term expenses, including maintenance and potential repairs, to ensure sustainability. Don’t forget to include any additional materials needed for installation, such as adhesives and underlayment.
Frequently Asked Questions
What is the lifespan of vinyl plank flooring?
Vinyl plank flooring typically lasts between 10 to 25 years, depending on the quality of the material and maintenance practices.
Is vinyl plank flooring comfortable to walk on?
Yes, vinyl plank flooring is designed to be comfortable underfoot, often featuring a cushioned layer that enhances comfort.
Can vinyl plank flooring be installed over existing floors?
In many cases, vinyl plank flooring can be installed over existing flooring, provided the surface is clean, level, and stable.
Is vinyl plank flooring resistant to scratches?
While vinyl plank flooring is relatively durable and resistant to scratches, it’s still advisable to use rugs or mats in high-traffic areas to protect its surface.
How do I clean vinyl plank flooring?
Cleansing vinyl plank flooring involves sweeping or vacuuming regularly, followed by mopping with a damp cloth and a cleaner designed for vinyl surfaces.